This tutorial explains basic web search using Apache SOLR and Apache Nutch.
Downloads
- JDK 7 – jdk-7u55-windows-x64.exe
- Cygwin – setup-x86_64.exe
- Apache Tomcat – apache-tomcat-7.0.53-windows-x64.zip
- Apache SOLR 4.8 – solr-4.8.0.zip
- Apache Nutch 1.4 – apache-nutch-1.4-bin.zip
JDK 7 Installation
- Run the downloaded executable to install java in the desired location.
- Set the JAVA_HOME environment variable.
Cygwin Installation
- Download and install cygwin in any directory.
- No additional packages are necessary and do a default install as shown below.

Apache Tomcat 7
- Download and extract the .zip file in any desired location.
Apache SOLR
- Download and extract SOLR zip file to any location.
- Create /solr/solr directory in any location, For example c:/solr/solr. Copy the contents of /solr-4.8.0.zip/solr-4.8.0/example/solr/ to the created directory. Create setenv.bat file in /apache-tomcat-7.0.53/bin/ directory and edit it to contain
set JAVA_OPTS=%JAVA_OPTS% -Dsolr.solr.home=C:\solr\solr
This directory will act as solr’s data directory.
- Copy /solr-4.8.0.zip/solr-4.8.0/example/solr/collection1/conf/lang/stopwords_en.txt to c:/solr/solr/collection1/conf/ directory.
- Copy /solr-4.8.0.zip/solr-4.8.0/dist/solr-4.8.0.war to /apache-tomcat-7.0.53/webapps/ directory.
- Copy all the jars in /solr-4.8.0.zip/solr-4.8.0/example/lib/ext/ path to /apache-tomcat-7.0.53/lib/ directory.
- Execute apache-tomcat-7.0.53/bin/startup.bat file.
- Launch a browser and hit http://localhost:8080/solr to see if admin solr’s admin page shows up.
Apache Nutch
- Download and extract Nutch zip file to any location.
- Create a directory with any name, for example ‘urls’ in /apache-nutch-1.4-bin/runtime/local/ directory. Create a text file with any name. Add the list of websites that have to be crawled as shown below.
http://nutch.apache.org/
- Edit /apache-nutch-1.4-bin/runtime/local/conf/regex-urlfilter.txt file – accept anything else section as shown below.
# accept anything else
+^http://([a-z0-9\-A-Z]*\.)*nutch.apache.org/([a-z0-9\-A-Z]*\/)*
- Edit /nutch-site.xml file and add a property as shown below.
<property> <name>http.agent.name</name> <value>nutch-crawler</value> <description>nutch-crawler</description> </property> - Launch cygwin and point to apache-nutch-1.4-bin directory. Execute the following command to check if nutch is working fine.
./bin/nutch crawl urls -dir myCrawl -depth 3 -topN 4
Apache Nutch – Apache SOLR Integration
- Rename schema.xml file in /solr/solr/collection1/conf/ directory to some random name. Copy /apache-nutch-1.4-bin/runtime/local/conf/schema-solr4.xml file to /solr/solr/collection1/conf directory, rename the file as schema.xml. Edit the copied schema.xml file to contain
<field name="_version_" type="long" indexed="true" stored="true"/>
within
- Restart tomcat server.
- Launch cygwin and point to apache-nutch-1.4-bin directory. Execute the following command to have nutch crawl and dump the data to solr.
./bin/nutch crawl urls -dir myCrawl -solr http://localhost:8080/solr/ -depth 3 -topN 4
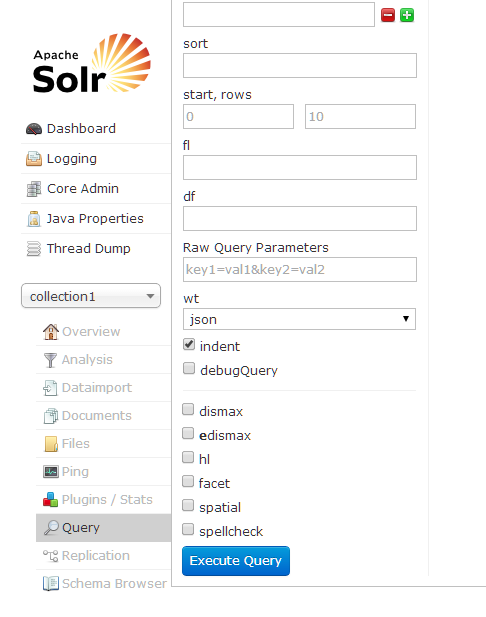
- Launch a browser and hit http://localhost:8080/solr to see if admin solr’s admin page shows up. Test as shown below.
Things to remember
- Having space in directory names may create issues. Don’t install JDK under ‘Program Files’. Don’t have space in any directory explained in this tutorial.
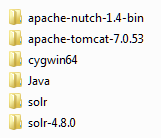
- My directory structure:
PS:
Please leave a comment if you think I have missed any step.

Thanks for your post, I’ve been searching and trying a lot of tutorial but this is the only one that fits!
LikeLike
Thanks for your post!
I’ve been trying a lot of tutorial but this is the only one that fits
LikeLike
Is it possible to use the latest nutch version? why did you use version 1.4?
LikeLike
i was getting a few issues.. would appreciate if you can get it working and post the steps here .. :)
LikeLike
Nice tutorial sir
I did all setting and using same version.When I type http://localhost:8080/solr
I will get http status 404 – solr
The requested resource is not availble
LikeLike
Did you start the tomcat server? Did it start without any issues?
LikeLike
YES I started the tomcat server.When I type http://localhost:8080/
It will show my tomcat page on the browser.
But when I type http://localhost:8080/solr
I will get http status 404 – solr
The requested resource is not available
LikeLike
yes I started the tomcat server.There is no issue during startup.Pls suggest me what to do.
LikeLike
Install Solr in Tomcat
Pre Requirements
1 – Machine with Windows OS (Windows 7,8,Xp.. ..etc)
2 – Java 6 or Above
3 – Solr 4.0.0 or Above
4 – Apache-tomcat 6 or Above.
Steps to get Solr up on Tomcat Server
1.Install Tomcat on your machine and make sure it is ready to start.(Check using localhost:8080)
2.Install Solr4.0 distribution package apache-solr-4.0.0.zip and unzip it in your local directory like C:\apache-solr-4.0.0.
3.Make a folder with name solr-home in your local machine like C:\solr_home.
4.Go back to the solr distribution package that you downloaded C:\apache-solr-4.0.0. Have a peek inside the Examples/solr (“C:\solr-4.4.0\example\solr”) folder. Copy all those files into the C:\solr_home folder.(server shutting down exception will come)
5.Look into C:\solr-home\solr and you will see two folders with name collection1 and bin, copy these two folders a step up to C:\solr_home.(if lib not copy “severe error filterstart” Exception come)
6.Copy all jar files from from C:\apache-solr-4.0.0\example\lib\ext to Tomcat Lib folder C:\Program Files\Apache Software Foundation\Tomcat 6.0\lib (https://wiki.apache.org/solr/SolrLogging#Using_the_example_logging_setup_in_containers_other_than_Jetty)
7.Copy apache-solr-4.0.war (rename to solr.war) from “C:\solr-4.4.0\dist” directory to webapps directory inside Tomcat.(C:\Program Files\Apache Software Foundation\Tomcat 6.0\webapps)
8.Start Tomcat and check localhost:8080/solr dashBoard will come
LikeLike
If I edit schema.xml then I am existing core example collection1 getting removed from UI. As I wants to add add my schema file. Please guide.
LikeLike